

DIY Vintage Inspired Cross Back Apron

Tabetha Hystad is a wife, homeschooling mama, registered nurse, and creator of Prairie Sweater Co. She lives in Bow Island, Alberta where she gets to raise her family to know and love the prairies and the God who created them. She spends her days at home learning alongside her children, growing plants, and always working on a DIY project. In her sewing room, Hystad can be found designing patterns, running her online storefront, and sewing for her brand and family. She has a passion for ethical and sustainable manufacturing, and teaching others the lost art of sewing and mending.
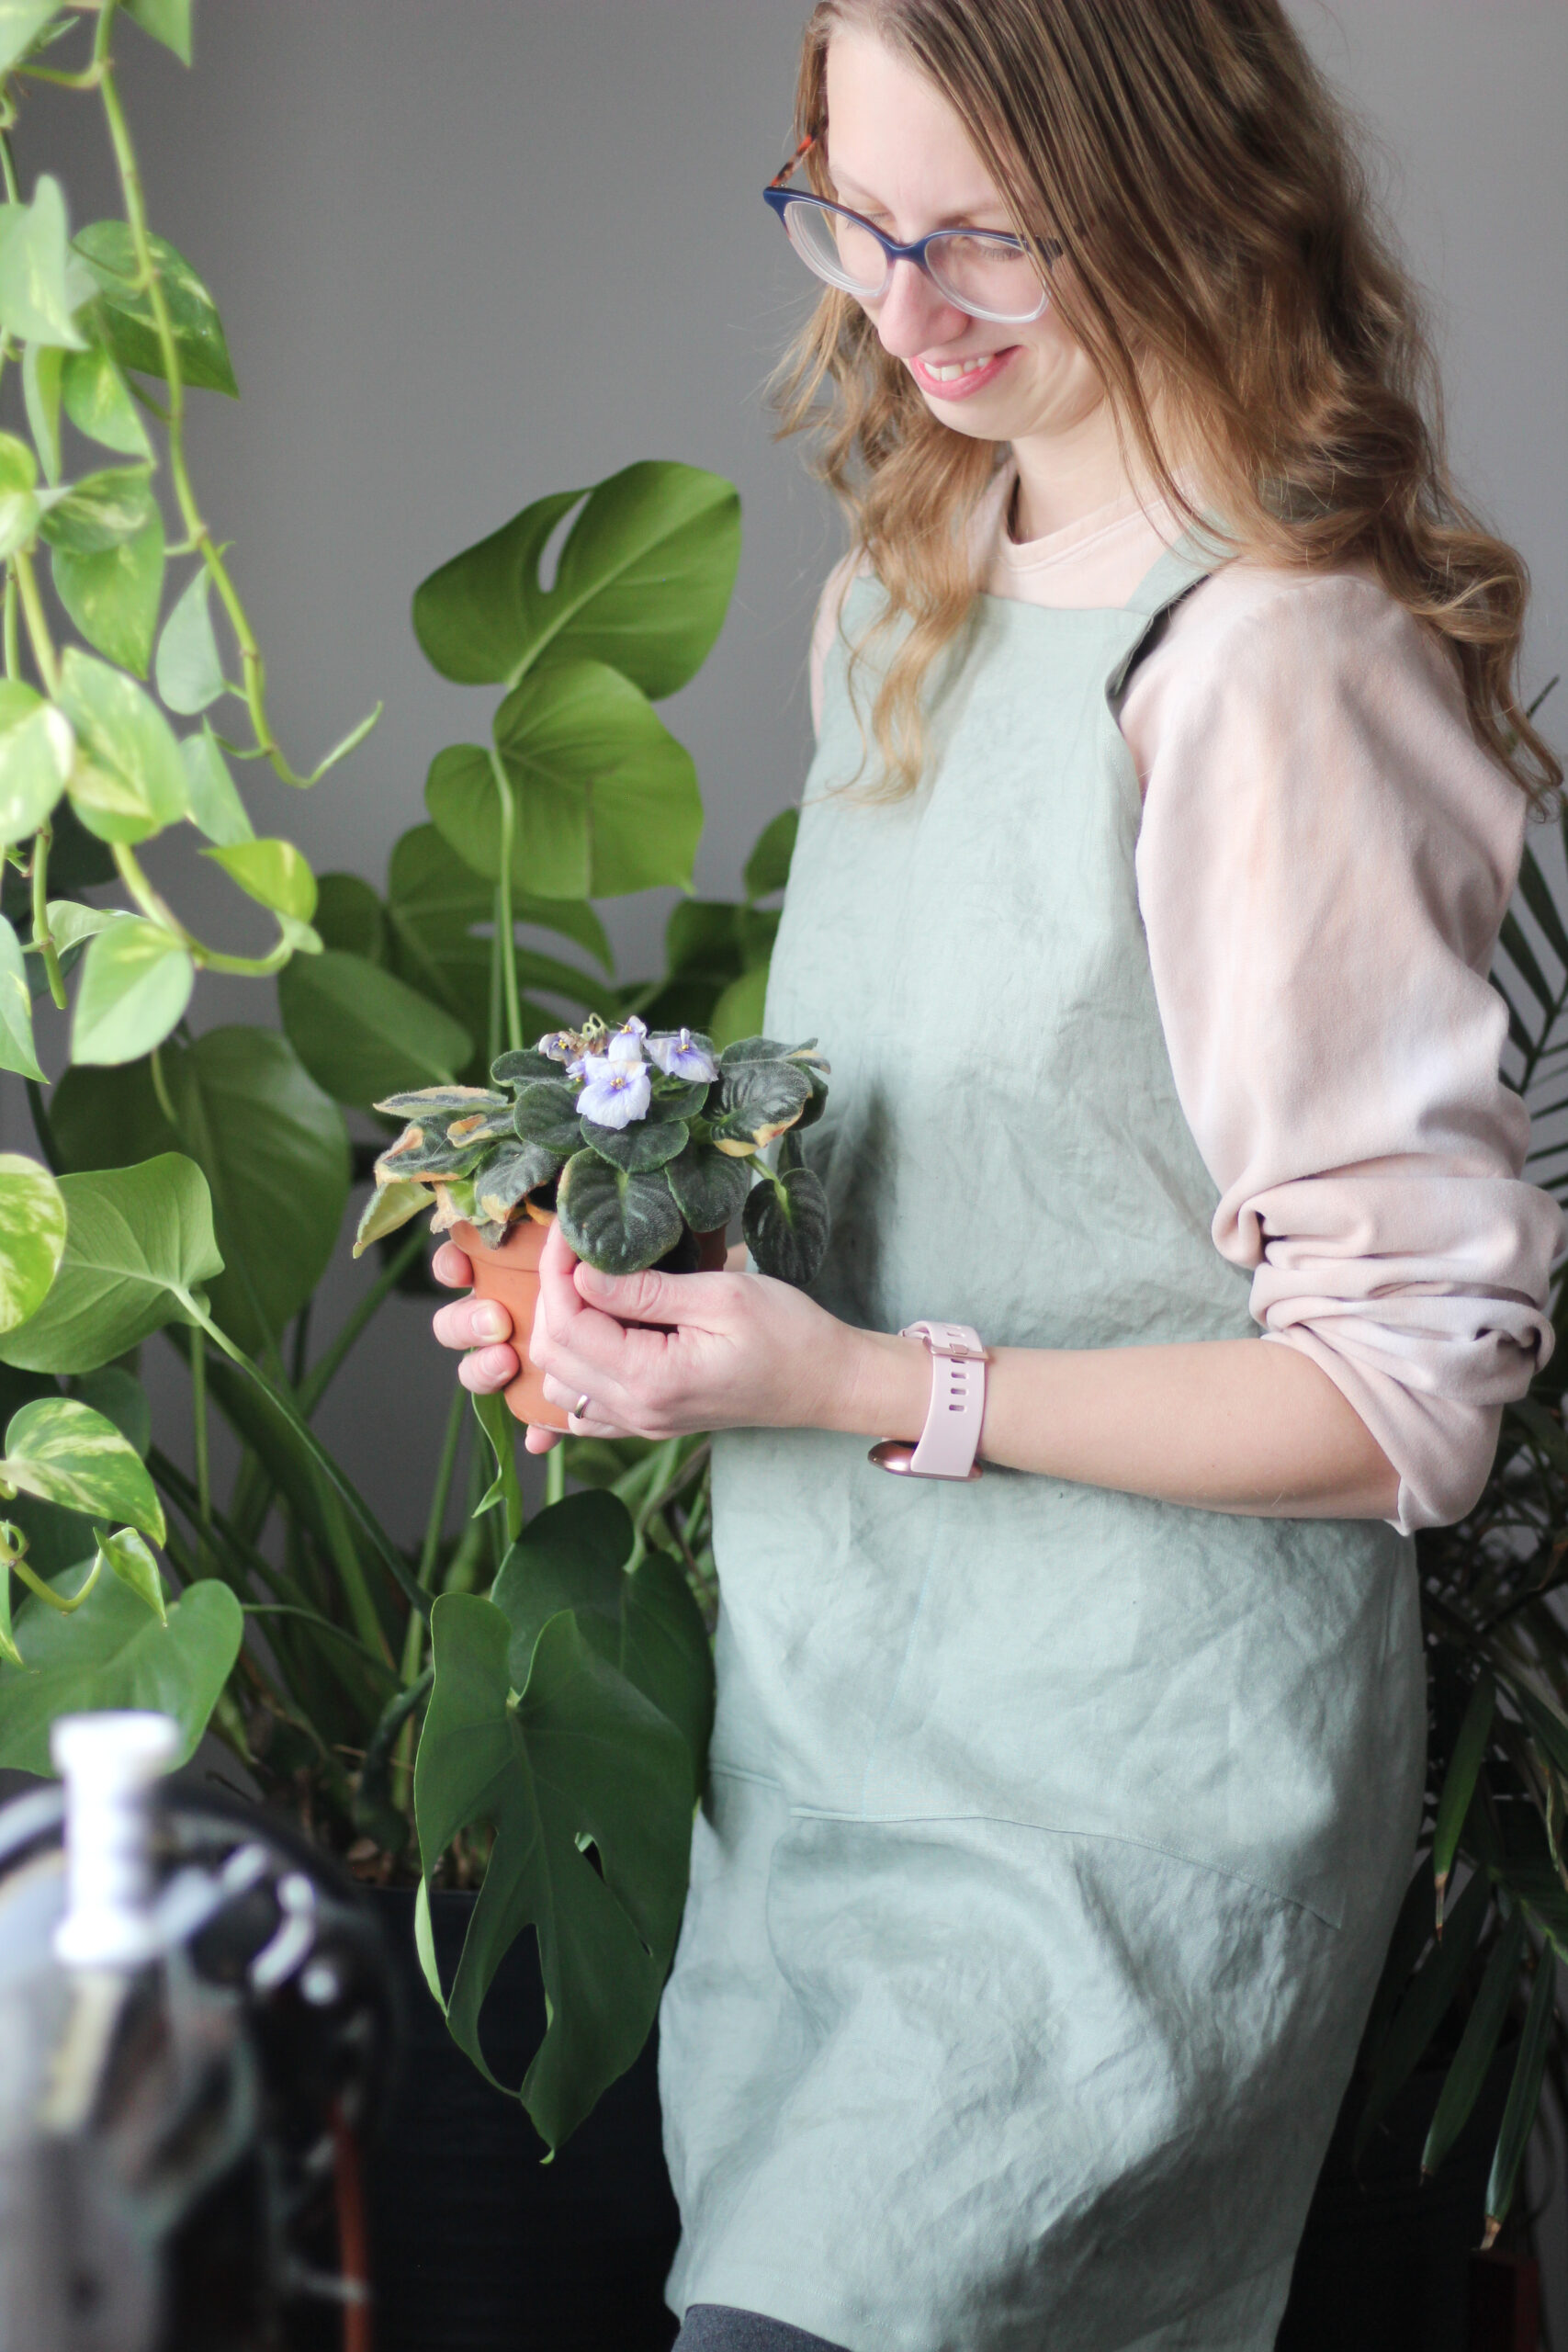
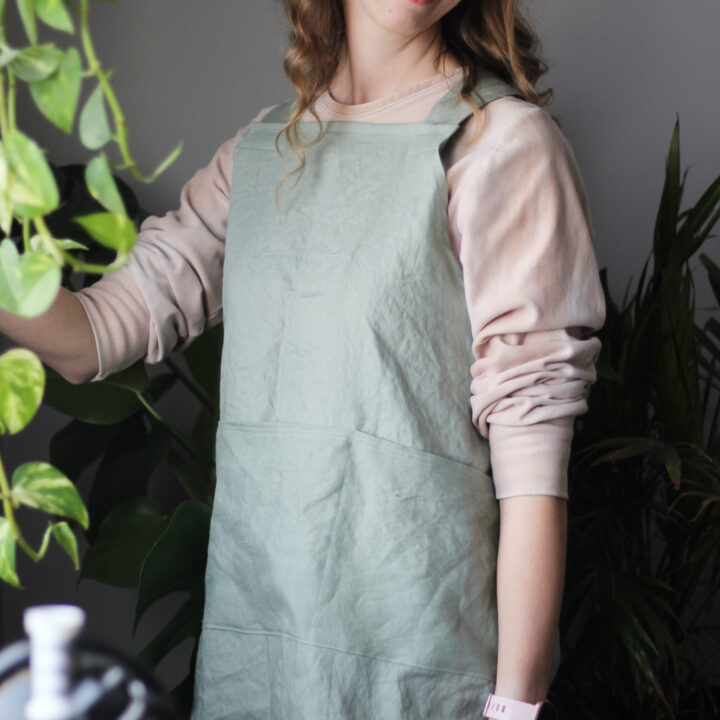
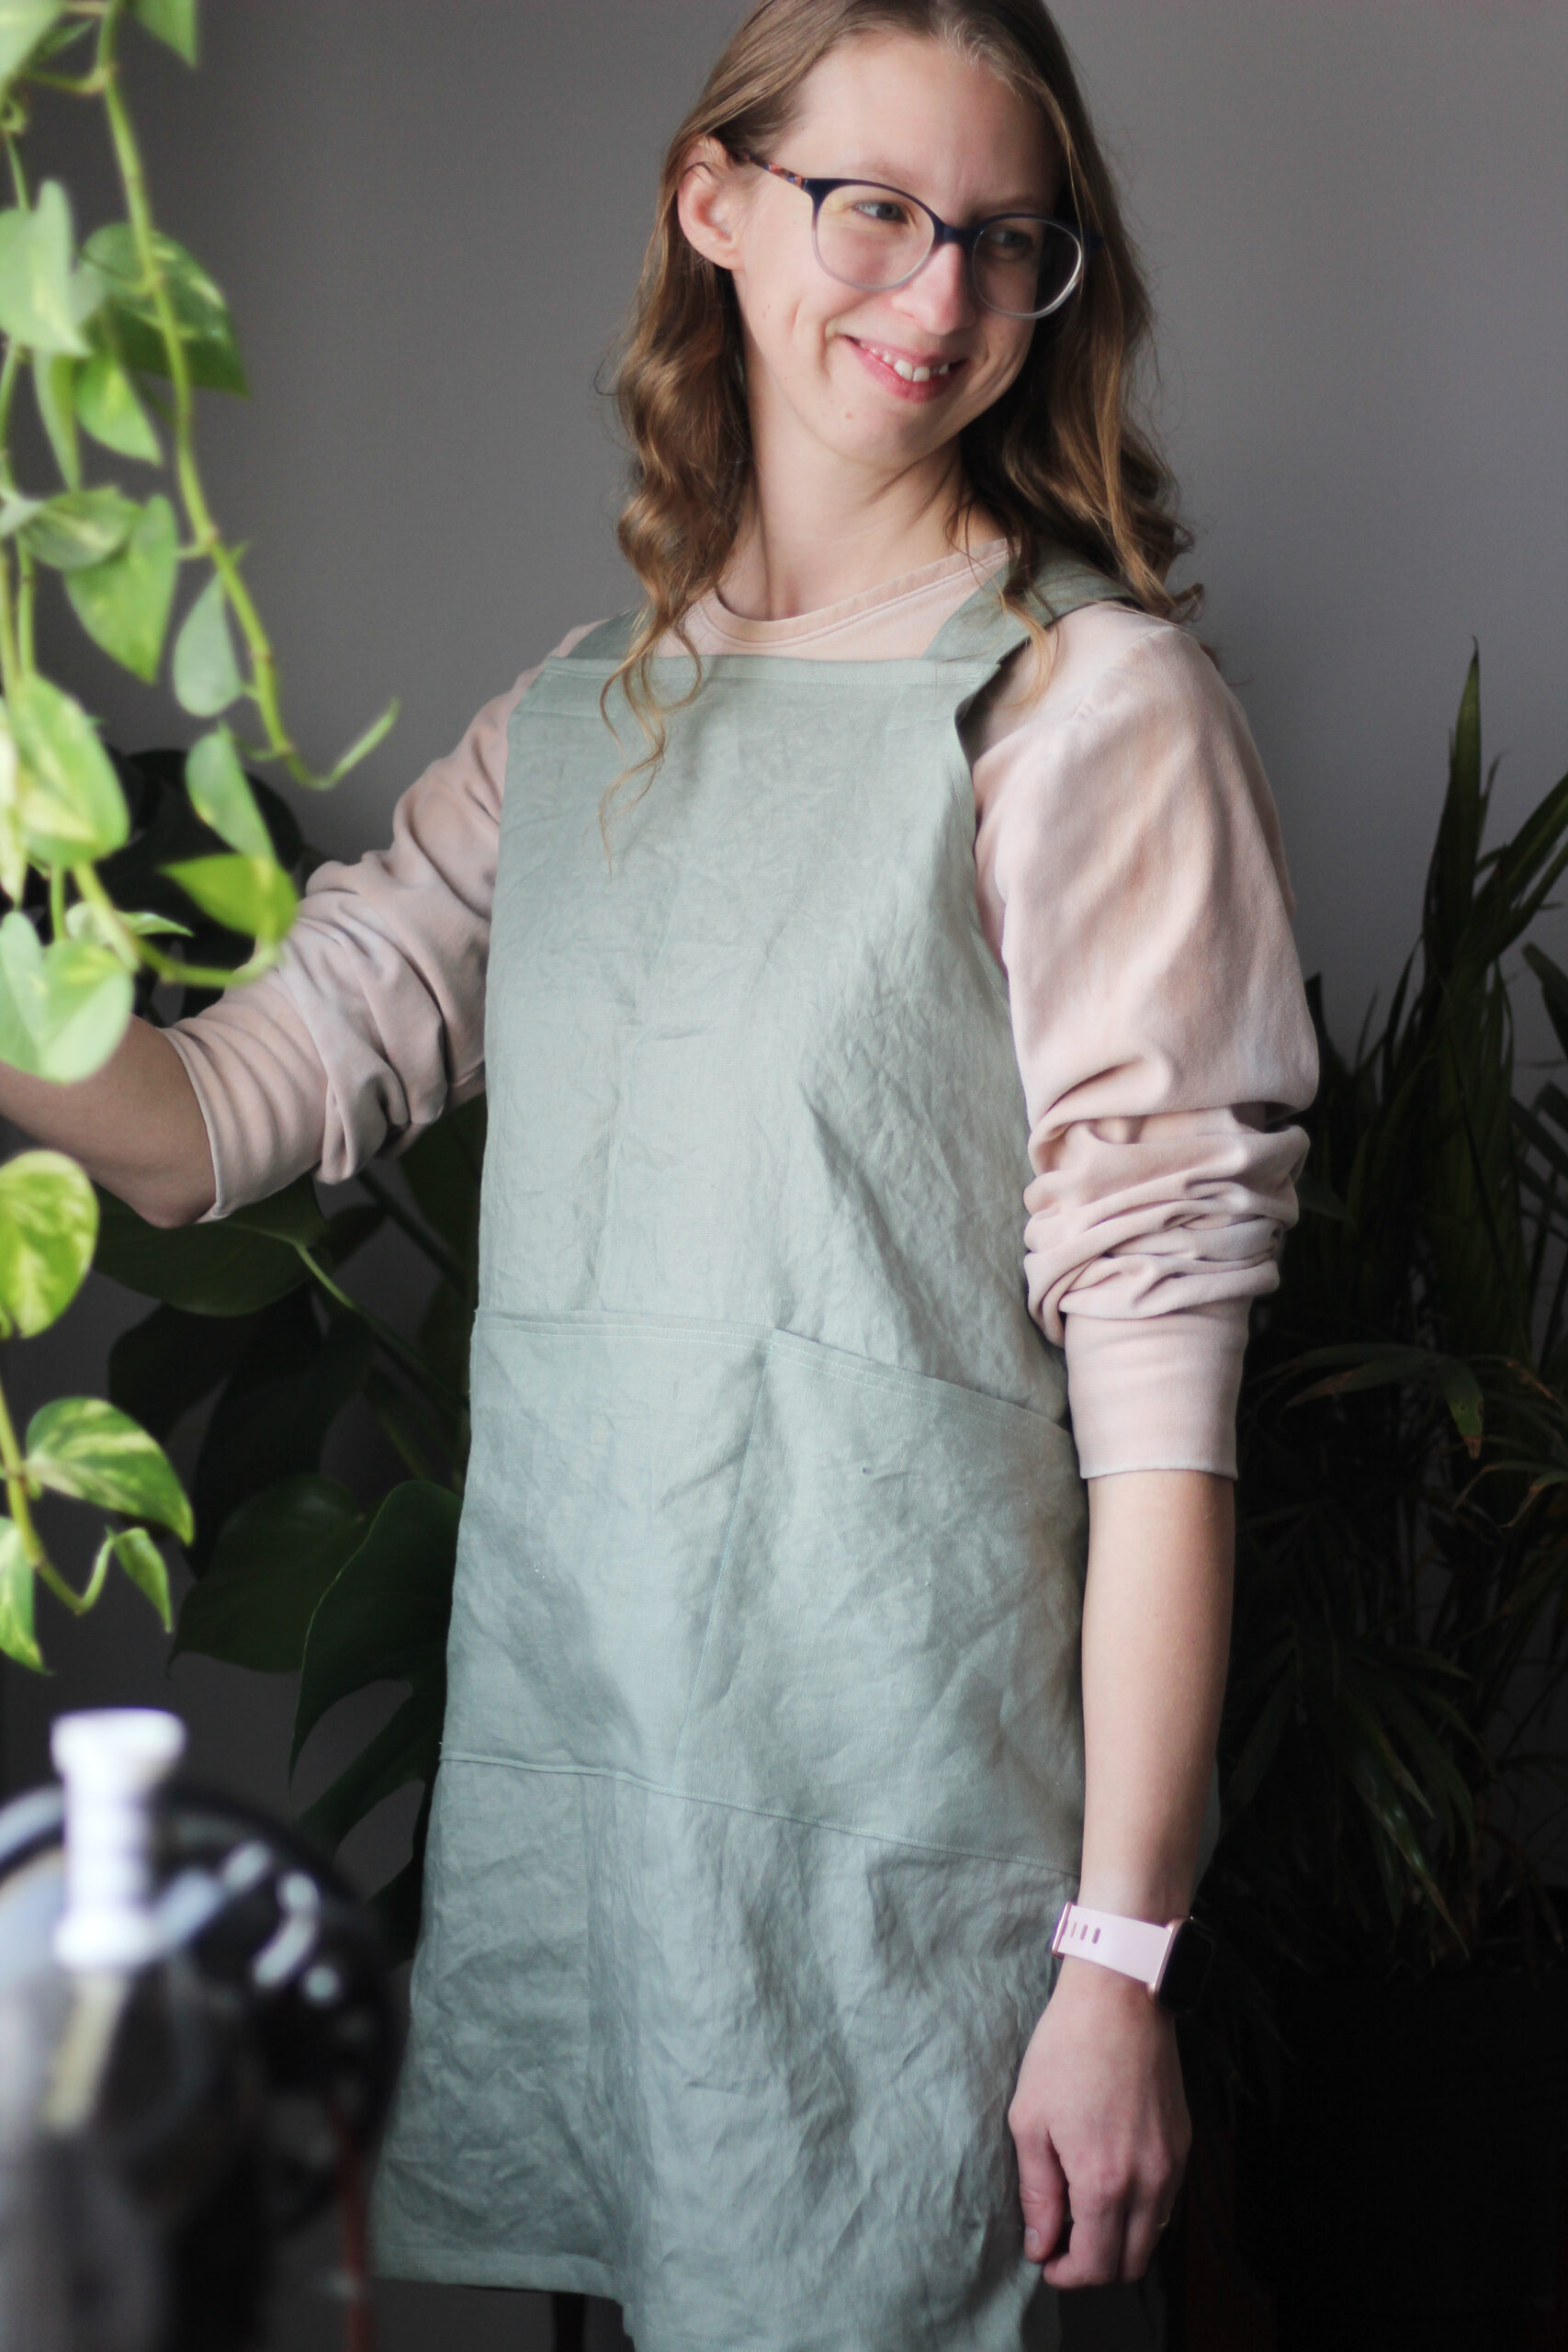
Spring weather calls for a beautiful but functional DIY vintage inspired cross back apron to wear in the kitchen, garden or just about anywhere! This vintage inspired cross back apron is a simple sewing project, perfect for a rainy day. I’ll walk you through the steps to creating your own pattern, and show you how a few basic sewing skills are all that’s needed to create your very own apron. You can customize the size and length for yourself, or even make a few modifications for a child’s size. I think this apron is perfect in linen, but you could also make one from any non-stretch cotton or hemp fabric as well.
Materials You’ll Need
- a yard to a yard and a half of your fabric of choice
- thread to match
Tools You’ll Need
- sewing machine
- iron
- measuring tape
- chalk/pencil for marking fabric
- scissors
- pins
- safety pin
How to Make This DIY Vintage Inspired Cross Back Apron
Fold your fabric in half with the right sides together and selvedge edges lined up.
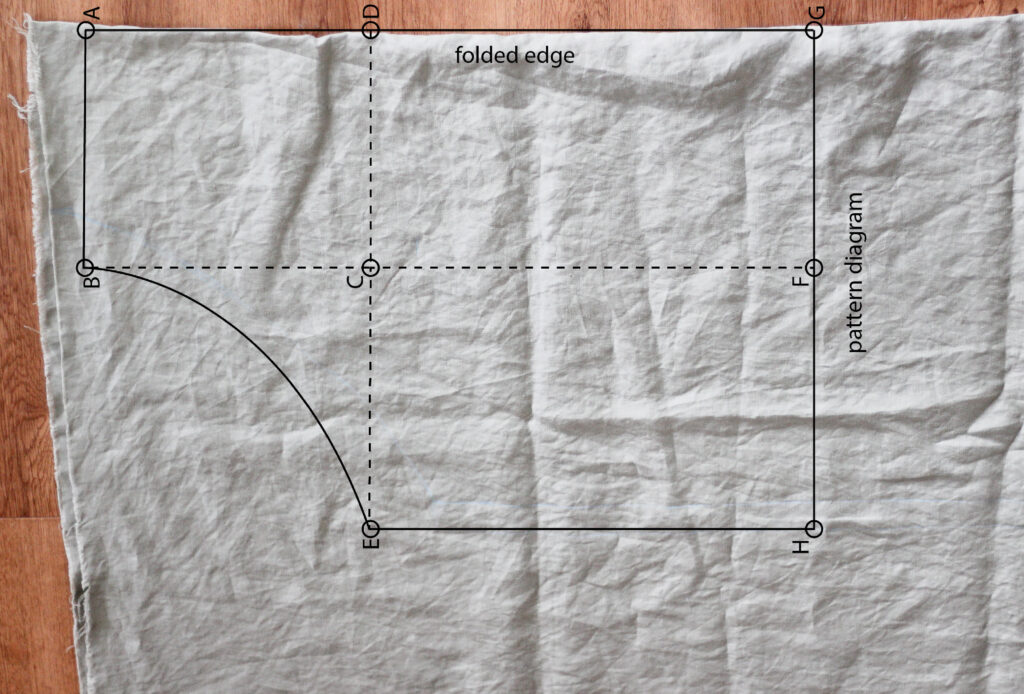
Follow the pattern diagram to mark the following lines on the fabric (with chalk or a pencil):
1. At the top of the fabric from the folded edge at point A to point B, make a line 6” long.
2. From point B to point C mark a line 11” long.
3. From the folded edge at point D to point E, mark a line that is approximately half of your waist measurement plus 1”. This line should cross through point C.
4. Draw a line from point B to point F that is about 30” long plus 1” for a hem. This will be the length of your apron, so it can be customized shorter or longer. This length was just above knee length for me.
5. Draw a line from point G to point H; and point E to point H.
6. Draw in a slight curve from point B to point E.
Now you have a completed apron pattern!
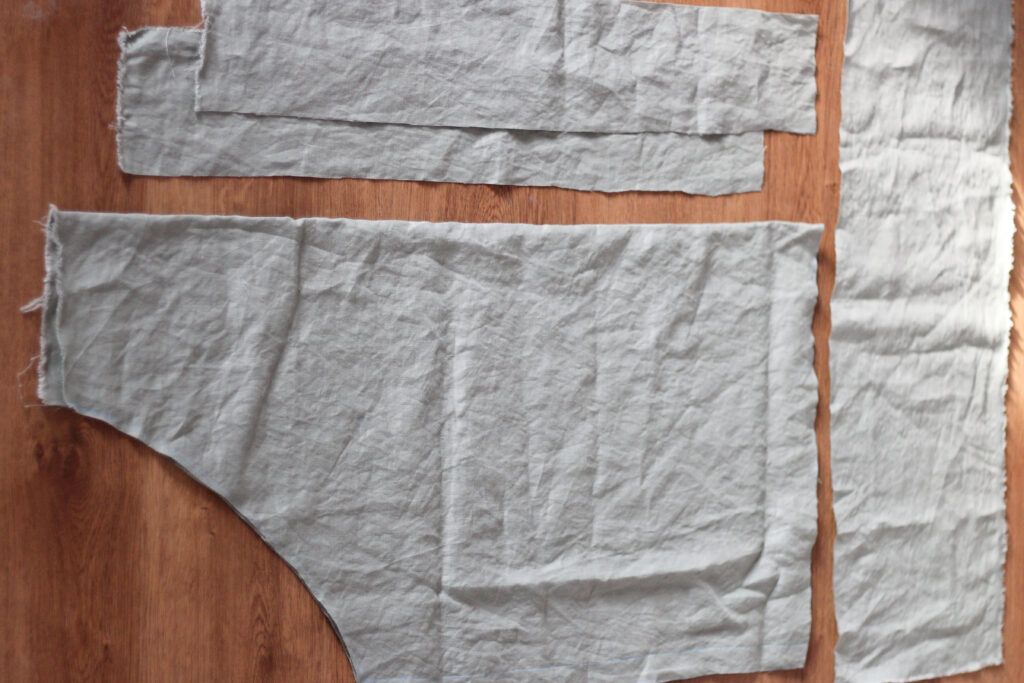
Cut out the apron. From the remaining fabric, cut 2 straps that are about 4” x 26”. Cut out one pocket piece that is 26” x 9”.
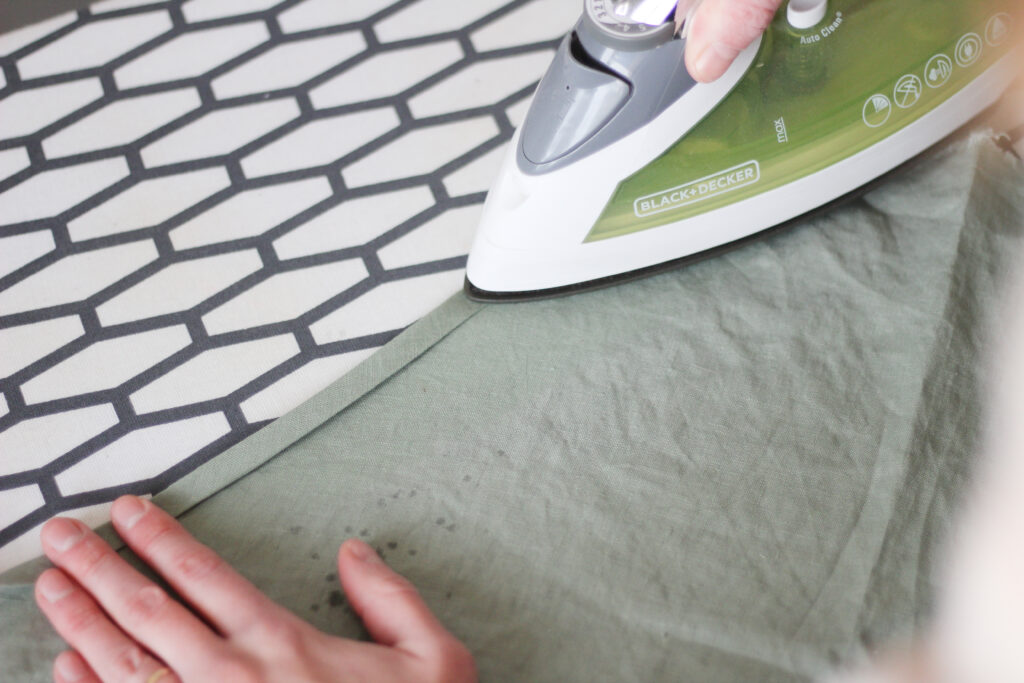
Hem all sides of the apron by turning under the edge 1/4” twice, so there are no raw edges exposed. Iron as you go and pin as needed. Sew close to the folded edge.

Hem all sides of the pocket piece by turning under the edge 1/4” twice, so there are no raw edges exposed. Iron as you go. Top stitch the top long edge of the pocket. Pin to the centre of the apron, lining up the top of the pocket below or along the line between points C to D. Stitch down the sides and bottom of the pocket, and add another line or two of stitching for a pocket divider if desired.
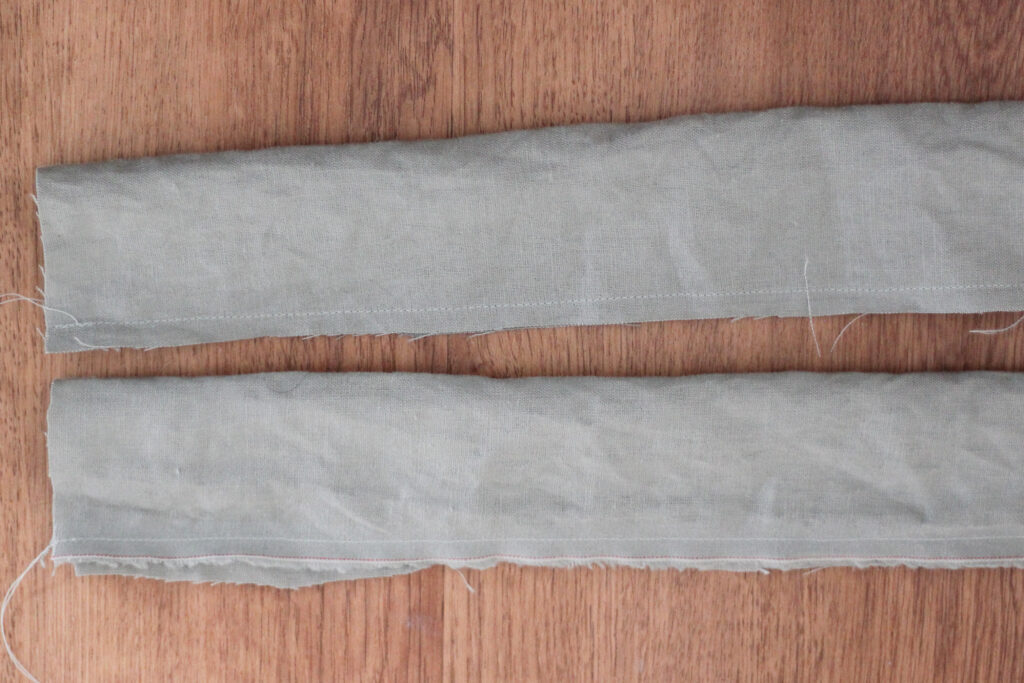

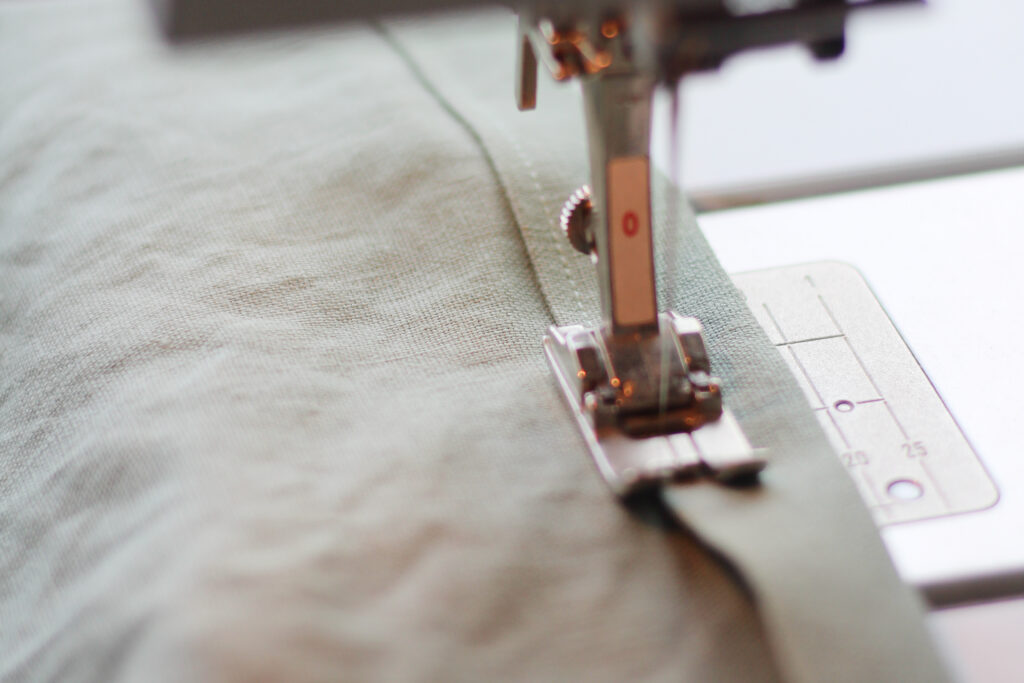
Fold the strap right sides together with long edges lined up. Sew 1/4” from the raw edge. Turn right side out using a safety pin and iron flat. At the short edges, tuck the raw edge of the fabric inside the tube 1/4” and iron. Topstitch around all sides of the strap. Repeat with the second strap.
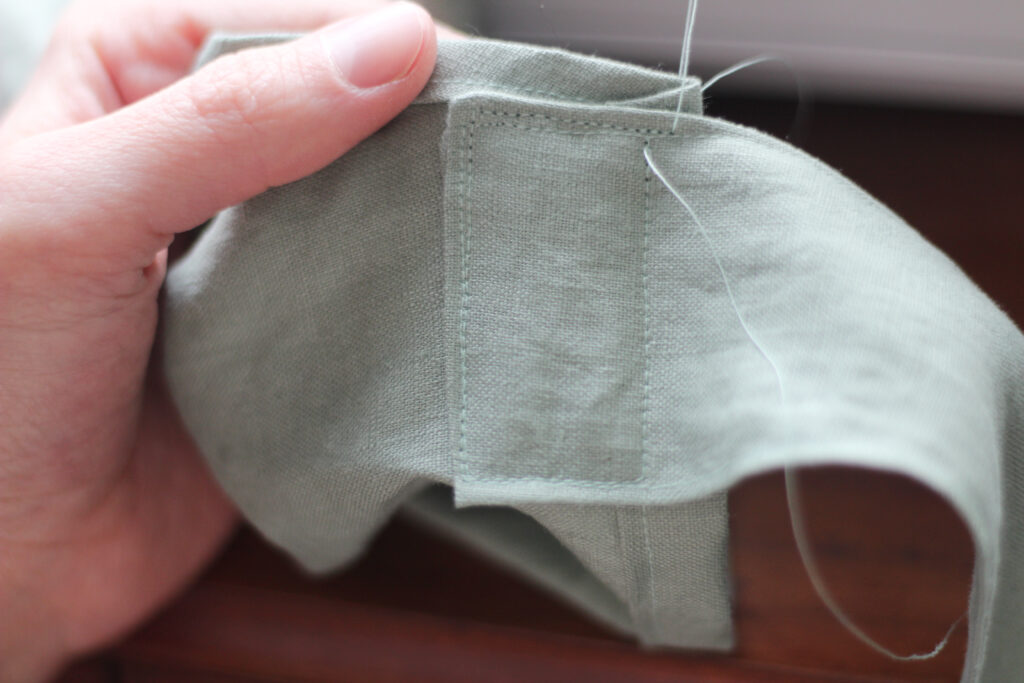
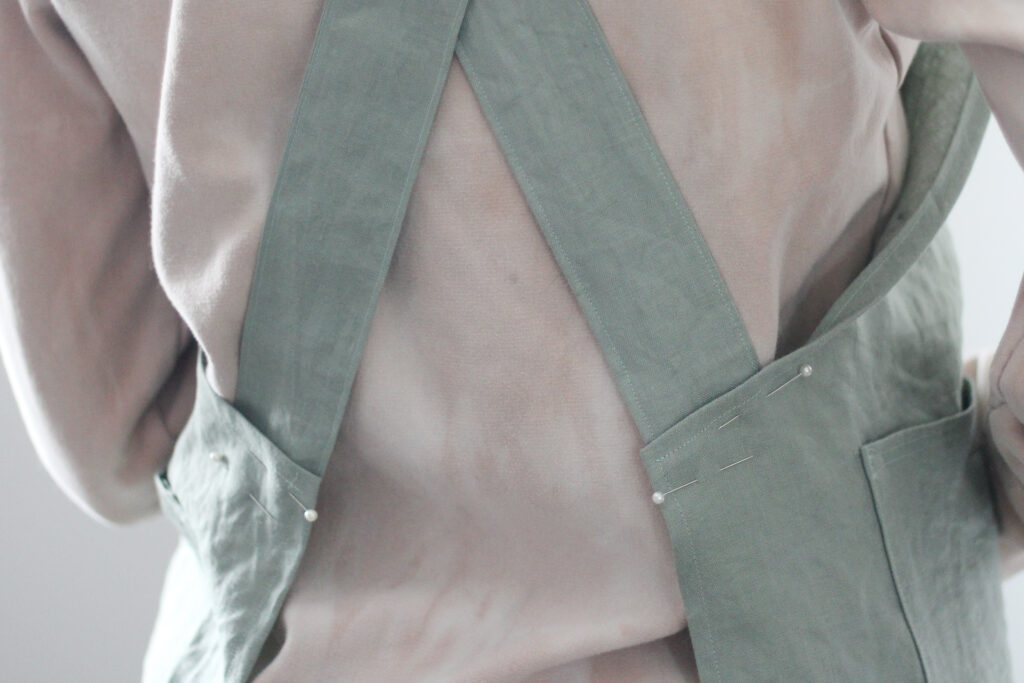
Pin one short edge of the strap to the wrong side of the top corner (point B) of the apron. Sew it in place by stitching in a square. Repeat with the second strap. Cross the straps over and pin them to the back corners (point E). Try on the apron to see how it fits. You can make the straps shorter if needed. Sew in place by stitching a square. Repeat with the second strap.
And there you have it! Your very own DIY vintage inspired cross back apron!
Article from: Trailblazher Magazine 2023 Spring Issue #10
More DIY Projects
DIY Vintage Inspired Cross Back Apron
Learn how to make this DIY Vintage Inspired Cross Back Apron
Materials
- a yard to a yard and a half of your fabric of choice
- thread to match
Tools
- sewing machine
- iron
- measuring tape
- chalk/pencil for marking fabric
- scissors
- pins
- safety pin
Instructions
- Fold your fabric in half with the right sides together and selvedge edges lined up.
- At the top of the fabric from the folded edge at point A to point B, make a line 6” long.
- From point B to point C mark a line 11” long.3. From the folded edge at point D to point E, mark a line that is approximately half of your waist measurement plus 1”. This line should cross through point C.
- Draw a line from point B to point F that is about 30” long plus 1” for a hem. This will be the length of your apron, so it can be customized shorter or longer. This length was just above knee length for me.5. Draw a line from point G to point H; and point E to point H.
- Draw in a slight curve from point B to point E. Your pattern is complete.
- Cut out the apron. From the remaining fabric, cut 2 straps that are about 4” x 26”. Cut out one pocket piece that is 26” x 9”.
- Hem all sides of the apron by turning under the edge 1/4” twice, so there are no raw edges exposed. Iron as you go and pin as needed. Sew close to the folded edge.
- Hem all sides of the pocket piece by turning under the edge 1/4” twice, so there are no raw edges exposed. Iron as you go. Top stitch the top long edge of the pocket. Pin to the centre of the apron, lining up the top of the pocket below or along the line between points C to D. Stitch down the sides and bottom of the pocket, and add another line or two of stitching for a pocket divider if desired.
- Fold the strap right sides together with long edges lined up. Sew 1/4” from the raw edge. Turn right side out using a safety pin and iron flat. At the short edges, tuck the raw edge of the fabric inside the tube 1/4” and iron. Topstitch around all sides of the strap. Repeat with the second strap.
- Pin one short edge of the strap to the wrong side of the top corner (point B) of the apron. Sew it in place by stitching in a square. Repeat with the second strap. Cross the straps over and pin them to the back corners (point E). Try on the apron to see how it fits. You can make the straps shorter if needed. Sew in place by stitching a square. Repeat with the second strap.
February 14, 2024
Keep Reading
next post
previous post


© 2025 Trailblazher Co. All Rights Reserved.
Legal